
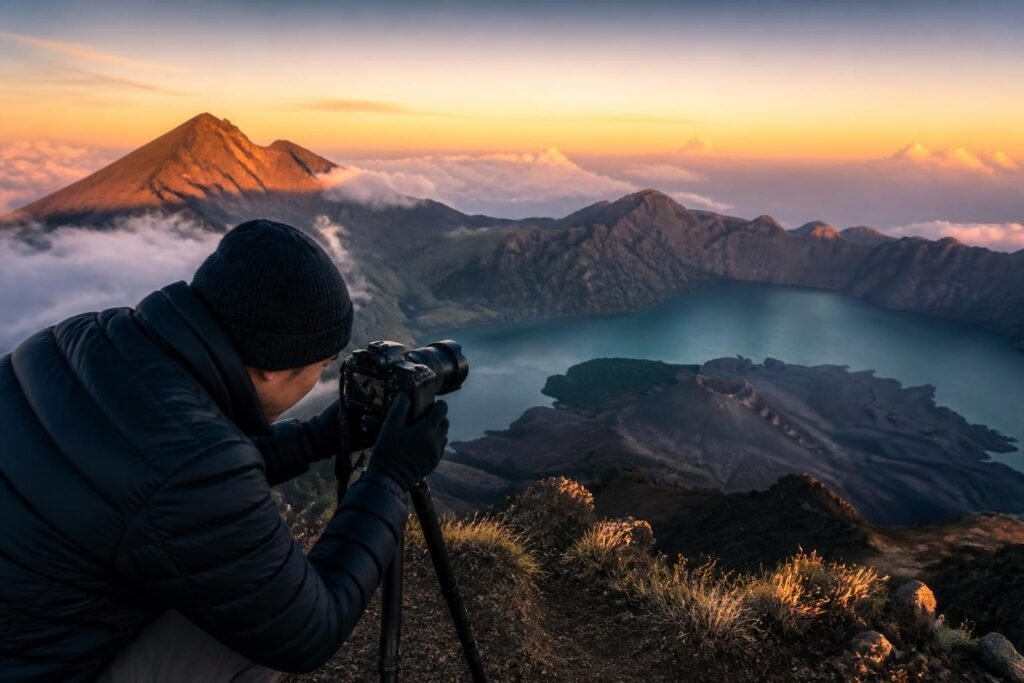
Capturing memorable trekking photos transforms your mountain adventure into lasting visual stories that inspire others and preserve your achievements. When you embark on challenging journeys through volcanic terrain, dense forests, and breathtaking summits, the photographs you take become treasured reminders of your perseverance and the natural beauty you encountered. Understanding the fundamentals of trekking photography ensures you return from your expedition with images that truly reflect the magnificence of your experience, whether you're documenting sunrise from a crater rim or the camaraderie shared with fellow adventurers along challenging trails.
Essential Gear for Trekking Photography
Selecting the right photography equipment for mountain treks requires balancing image quality with weight considerations. Every ounce matters when you're ascending thousands of meters, so thoughtful gear choices become paramount to both your comfort and photographic success.
Camera Body Selection
Your camera choice significantly impacts your trekking experience. Mirrorless cameras offer excellent image quality while weighing substantially less than traditional DSLRs, making them ideal for multi-day expeditions. Modern mirrorless systems provide weather sealing, which protects your investment from rain, humidity, and dust encountered on volcanic trails.
Key features to prioritize:
- Weather-sealed body construction
- Reliable autofocus performance in varying light
- Extended battery life for multiple days
- Lightweight design (under 700 grams preferred)
- In-body image stabilization for sharper handheld shots
Sensor size represents another critical consideration. Full-frame sensors excel in low-light conditions, essential for capturing pre-dawn summit attempts or evening camp scenes. However, APS-C sensors offer weight savings and extended effective focal length, beneficial when photographing distant peaks or wildlife.
Lens Strategy
Carrying multiple lenses increases versatility but adds substantial weight. Most experienced trekking photographers limit themselves to one or two carefully selected lenses that cover their primary shooting scenarios.
| Lens Type | Focal Range | Best For | Weight Consideration |
|---|---|---|---|
| Standard Zoom | 24-70mm | Landscapes, portraits, camp scenes | Moderate (500-800g) |
| Wide Angle | 16-35mm | Expansive vistas, starry skies | Light (400-600g) |
| Telephoto Zoom | 70-200mm | Distant peaks, wildlife, compression | Heavy (800-1400g) |
| Prime Lens | 35mm or 50mm | Low light, lightweight option | Very light (200-400g) |
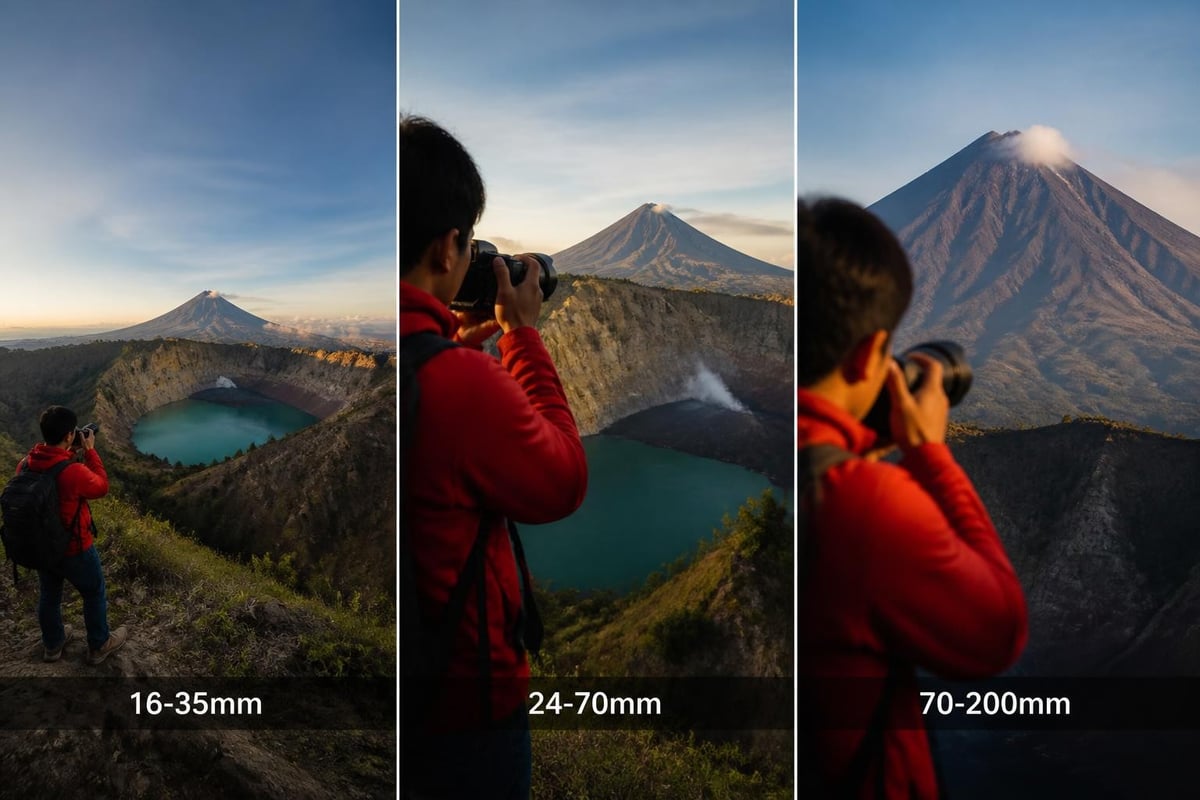
A versatile approach involves carrying a single 24-105mm or 24-120mm lens that covers most trekking scenarios. This strategy minimizes weight while maintaining creative flexibility for capturing both sweeping panoramas and detailed environmental portraits.
Protection and Carrying Solutions
Mountain environments present numerous hazards to camera equipment. Proper gear protection prevents costly damage and ensures your equipment functions reliably throughout your expedition.
Invest in a weather-resistant camera bag designed specifically for hiking. Peak Design and MindShift Gear manufacture excellent options that distribute weight comfortably across your shoulders and hips. Internal padding protects against impacts while quick-access compartments allow you to capture spontaneous moments without removing your pack entirely.
Rain covers are non-negotiable for tropical mountain environments where afternoon storms frequently develop. Lightweight silicone covers weigh mere ounces but provide crucial protection during sudden downpours common on volcanic peaks.
Technical Settings for Mountain Photography
Mastering camera settings specific to trekking environments dramatically improves your image quality. Mountain conditions challenge automatic camera modes with extreme contrast, changing light, and unpredictable weather patterns.
Exposure Fundamentals
Mountain photography demands understanding the exposure triangle: aperture, shutter speed, and ISO work together to create properly exposed images. The dramatic elevation changes you experience while trekking introduce lighting variations that require constant adjustment.
Aperture priorities:
- Use f/8 to f/11 for maximum sharpness in landscape shots
- Open to f/2.8 or f/4 for low-light situations at camp
- Increase to f/16 when you need extensive depth of field
- Consider diffraction effects above f/16 on most sensors
Shutter speed selection depends on your subject and available light. Stationary landscapes allow slower speeds (1/60 second or slower with stabilization), while moving subjects like fellow trekkers require 1/250 second or faster to freeze action. For capturing flowing water at natural springs or waterfalls, experiment with speeds between 1/4 and 2 seconds.
ISO management becomes critical in challenging mountain light. Modern cameras handle ISO 1600-3200 remarkably well, enabling handheld photography during golden hour or inside shadowed volcanic craters. When using a tripod, always return to base ISO (typically 100 or 200) for maximum image quality.
Focusing Techniques
Achieving sharp focus in expansive mountain landscapes requires strategic focusing point selection. Rather than focusing at infinity, use the hyperfocal distance technique to maximize sharpness from foreground to background.
Single-point autofocus gives you precise control over which elements appear sharpest. Position your focus point approximately one-third into your frame's depth for optimal results in landscape compositions. Back-button focus separates focusing from shutter activation, preventing your camera from refocusing between shots when you've carefully composed your image.
For summit attempts during low-light hours, switch to manual focus combined with focus peaking or magnification to ensure critical sharpness despite challenging autofocus conditions.
Composition Strategies for Trekking Photos
Compelling trekking photos transcend simple documentation by incorporating deliberate compositional elements that guide viewers through your visual narrative. Understanding fundamental composition principles elevates your images from snapshots to captivating stories.
Rule of Thirds and Beyond
The rule of thirds provides a foundational framework for balanced compositions. Imagine dividing your frame into nine equal sections using two horizontal and two vertical lines. Positioning key elements along these lines or at their intersections creates natural visual harmony.
However, effective trekking photography sometimes demands breaking this rule. Centered compositions work beautifully when photographing symmetrical scenes like volcanic cones reflected in crater lakes or capturing the solitary magnificence of a summit marker against endless sky.
Advanced composition techniques:
- Leading lines guide viewers into your frame using trails, ridgelines, or geological formations
- Foreground interest anchors wide landscape shots with rocks, vegetation, or equipment
- Frame within frame uses natural elements like cave openings or tree branches to direct attention
- Negative space emphasizes isolation and scale in mountain environments
- Layering creates depth by including distinct foreground, middle ground, and background elements
Capturing Scale and Drama
One challenge in mountain photography involves conveying the immense scale of your surroundings. Without reference points, even spectacular peaks appear diminished in photographs.
Include human elements to provide scale context. A fellow trekker positioned on a distant ridgeline or examining a massive boulder demonstrates the landscape's true proportions. These elements simultaneously add narrative interest to your images, transforming abstract landscapes into relatable adventure stories.
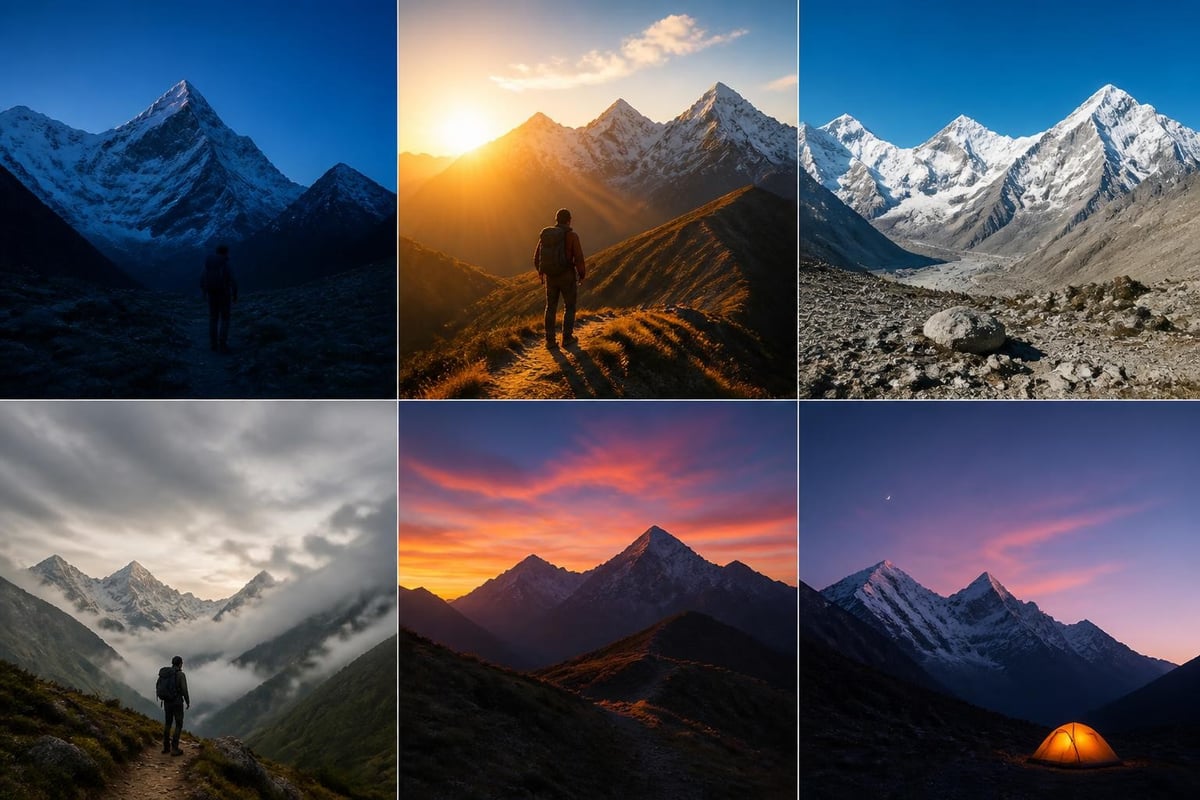
Golden hour light (the hour after sunrise and before sunset) transforms ordinary scenes into extraordinary images. The warm, directional light during these periods enhances texture in volcanic rock, creates dramatic shadows that reveal topographic detail, and bathes entire landscapes in captivating color.
Photographing Different Trek Stages
Each phase of your trekking journey presents unique photographic opportunities and challenges. Adapting your approach to these distinct stages ensures comprehensive documentation of your complete adventure.
Departure and Trail Photography
Your trek begins long before reaching dramatic viewpoints. The departure from trailheads, initial forest sections, and gradual ascent through changing vegetation zones deserve photographic attention.
Document the anticipation visible in your group's faces during pre-dawn preparations. Capture the methodical process of guides checking equipment and distributing loads. These seemingly mundane moments gain significance when reviewing your complete journey later.
Trail photography requires special techniques to maintain hiking pace while capturing quality images. Keep your camera accessible in a chest-mounted or waist-belt holster rather than buried in your pack. This positioning allows quick shooting without disrupting your group's rhythm.
Camp Life Documentation
Evening camps provide rich opportunities for capturing authentic trekking experiences. The activities surrounding meal preparation, tent setup, and group interaction reveal the human dimension of mountain adventures.
Portrait photography at camp benefits from softer evening light that flatters skin tones and creates pleasant catchlights in subjects' eyes. Position your subjects with light sources slightly behind them for beautiful rim lighting that separates them from backgrounds.
Environmental portraits showing trekkers engaged in camp activities tell more compelling stories than isolated headshots. Photograph your guide preparing meals, teammates sharing stories, or individuals gazing at the stars emerging overhead.
Summit and Sunrise Photography
Summit attempts typically occur during pre-dawn hours, presenting extreme photographic challenges. Minimal light, exhaustion, and cold temperatures test both photographer and equipment.
Prepare your camera settings before reaching the summit. In darkness, fumbling with menus and dials becomes frustrating and risks missing crucial moments. Set your ISO to 1600 or higher, open your aperture to its widest setting, and enable continuous shooting mode.
The transition from darkness to dawn provides extraordinary opportunities. Trekking photography during golden hours captures the magical quality of changing light painting volcanic landscapes.
Summit photography checklist:
- Fully charged batteries (cold reduces capacity by 30-50%)
- Lens cleaned of condensation from temperature changes
- Tripod deployed before sunrise for stable long exposures
- Multiple exposures bracketed for HDR processing
- Group summit photos with self-timer or remote trigger
Battery Management and Power Solutions
Electronic devices drain rapidly in mountain environments due to cold temperatures and intensive use. Strategic battery management prevents missing critical photographic opportunities.
Cold Weather Battery Strategies
Lithium-ion batteries lose significant capacity below 15°C (59°F). During summit attempts when temperatures plunge near freezing, unprotected batteries may retain only 50-60% of their normal charge.
Keep spare batteries in interior jacket pockets close to your body. Your body heat maintains battery temperature and preserves capacity. Immediately before shooting, swap cold batteries from your camera with warm spares from your pockets.
Battery grips that hold two batteries provide extended shooting capacity and improved handling with larger lenses. However, their additional weight requires careful consideration for multi-day treks.
Charging Solutions for Multi-Day Treks
Expeditions lasting several days without electricity access demand alternative charging solutions. Solar panels designed for backpacking generate sufficient power to recharge camera batteries, smartphones, and portable power banks during breaks or while hiking.
| Power Solution | Capacity | Weight | Best Use Case |
|---|---|---|---|
| Spare Batteries | 1-2 full charges | 50-80g each | Essential baseline |
| 10,000mAh Power Bank | 2-4 camera charges | 200-250g | Multi-device support |
| 20W Solar Panel | Unlimited (weather dependent) | 400-600g | Extended expeditions |
| Camera Battery Grip | Doubles capacity | 200-300g | Professional shooting |
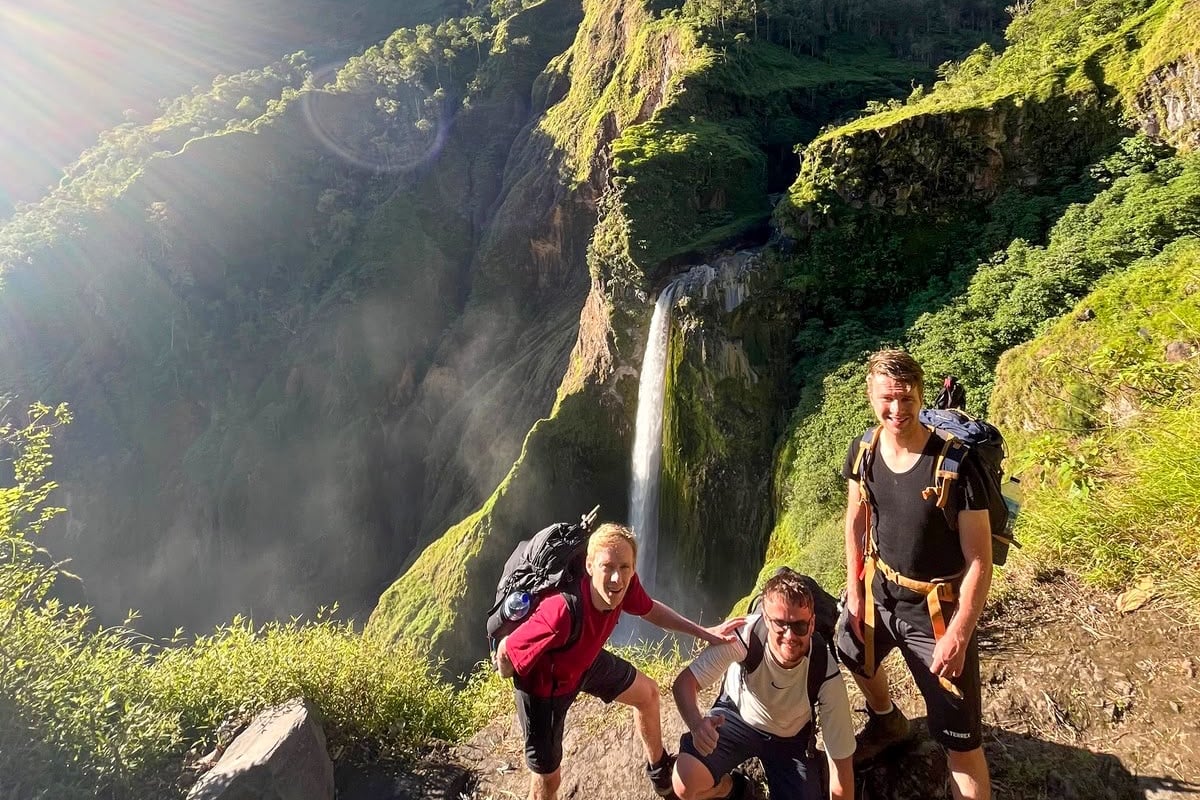
For those embarking on the 3D2N Torean summit trek, carrying at least three fully charged batteries plus a 10,000mAh power bank ensures you'll capture every moment from the Jurassic Park-like landscapes to the triumphant summit sunrise. This combination provides sufficient power for approximately 1,500-2,000 shots under normal conditions.
Power Conservation Techniques
Extending battery life requires modifying camera behaviors that consume power unnecessarily. Disable image review displays, which illuminate the rear LCD after every shot. Instead, review images periodically in batches.
Turn off image stabilization when shooting from a tripod. This feature consumes power while providing no benefit for stable shooting platforms. Reduce LCD brightness to the minimum level readable in prevailing light conditions.
Airplane mode on smartphones prevents constant searching for cellular signals that drain batteries rapidly. You'll typically have no service on remote mountain trails anyway, making this feature unnecessary until returning to lower elevations.
Weather Challenges and Solutions
Mountain weather changes rapidly and dramatically. Successful trekking photos require preparing for rain, fog, extreme cold, and intense sunlight within single expeditions.
Protecting Gear from Moisture
Tropical volcanic peaks experience high humidity and frequent precipitation. Moisture threatens camera electronics through both direct rain exposure and condensation forming when moving between temperature zones.
Silica gel packets stored in camera bags absorb ambient moisture, protecting against condensation damage. Replace or reactivate these desiccants regularly by heating them to restore absorption capacity. Waterproof stuff sacks provide additional protection layers for camera bags during torrential downpours.
When transitioning from cold exterior conditions into warm tents, condensation forms immediately on cold camera bodies. Place your camera in a sealed plastic bag before entering the tent, allowing gradual temperature equalization without moisture forming directly on equipment.
Shooting in Adverse Conditions
Some of your most dramatic trekking photos emerge during challenging weather. Mist swirling through volcanic craters, storm clouds building over distant peaks, and rain-soaked vegetation create atmospheric scenes impossible during clear weather.
Photography during challenging mountain conditions demands protecting yourself alongside your equipment. Waterproof gloves with touchscreen-compatible fingertips allow camera operation without exposing hands to cold and wet conditions.
Lens hoods prevent rain from striking front lens elements while reducing flare from scattered light. Combined with frequent lens cleaning using microfiber cloths, you can maintain clear shots even during light precipitation.
Post-Processing Workflow for Trek Photos
Your photographic work continues after returning from the mountain. Thoughtful post-processing enhances your trekking photos while maintaining authentic representation of your experience.
Field Selection and Culling
Multi-day treks generate hundreds or thousands of images. Efficient culling separates exceptional images from similar variations and outright failures.
Begin by eliminating technical failures: out-of-focus shots, severe over or underexposure, and images with distracting elements. This initial pass typically removes 30-40% of captured frames.
Next, identify your strongest images from each location or activity. Rather than keeping five similar summit shots, select the single best frame showing optimal composition, expression, and light quality.
Selection criteria for trekking photos:
- Technical excellence (sharp focus, proper exposure)
- Emotional impact and storytelling value
- Unique perspective or uncommon conditions
- Strong composition and visual interest
- Authenticity and accurate representation
Enhancement Techniques
Modern editing software provides powerful tools for optimizing your images. However, maintaining natural appearance preserves the authenticity that makes trekking photos meaningful.
Adjust exposure and contrast to match what you experienced visually. Human eyes adapt to extreme brightness ranges that cameras cannot capture in single exposures. Subtle shadow lifting and highlight recovery restore perceived reality without creating obviously manipulated images.
Color correction compensates for atmospheric haze common at high elevations. Slight vibrance increases and haze removal restore the vivid colors you witnessed firsthand. Avoid excessive saturation that creates unnatural, oversaturated appearances.
Sharpening enhances detail in landscape elements while maintaining smooth, natural skin tones in portraits. Apply selective sharpening using masks that target landscapes while protecting faces from over-sharpening artifacts.
Creating Visual Stories from Your Trek
Individual trekking photos gain significance when presented as cohesive narratives documenting your complete journey. Thoughtful organization transforms disconnected images into compelling adventure stories.
Sequencing and Narrative Flow
Arrange images chronologically to mirror your actual progression through the trek. This natural sequence helps viewers experience your journey vicariously, from anticipation during initial forest trails through challenges of steep ascents to triumph at summit viewpoints.
Include variety in your selected images: wide establishing shots of landscapes, medium-range environmental portraits, and detailed close-ups of unique elements. This variation maintains visual interest while providing comprehensive documentation.
Transition images between major locations help viewers understand geographic relationships and journey progression. Shots of trail markers, changing vegetation zones, and glimpses of destination peaks create continuity throughout your visual narrative.
Sharing Platforms and Presentation
Different platforms demand different presentation approaches. Instagram favors square crops and punchy, high-contrast processing. Photo books benefit from full-resolution images and subtle processing that reproduces accurately in print.
When sharing on Hiking Mount Rinjani’s platform, consider how your images might inspire future trekkers. Include location context in captions, describing specific viewpoints and conditions that produced memorable shots.
Online galleries allow organizing images into themed collections: landscapes, portraits, wildlife encounters, and camp life. This organization helps viewers find images matching their specific interests while showcasing the diversity of your trekking experience.
Ethical Considerations in Trekking Photography
Responsible trekking photography respects both natural environments and local communities whose territories you traverse. Understanding these ethical dimensions ensures your photographic pursuits enhance rather than compromise mountain conservation efforts.
Leave No Trace Principles
Photography sometimes tempts trekkers to venture off established trails seeking unique vantage points. However, trampling fragile alpine vegetation for photographs contradicts leave-no-trace principles and accelerates environmental degradation.
Photograph from established viewpoints and trails whenever possible. When composition requires repositioning, step carefully on durable surfaces like rock rather than crushing delicate plants. The few extra minutes required for considerate movement preserve environments for future visitors.
Remove all traces of your photographic activities. Tripod indentations in soft soil, disturbed rocks arranged for foreground interest, and trampled areas around popular viewpoints all detract from wilderness character.
Cultural Sensitivity and Permissions
Mountain regions often hold cultural and spiritual significance for local communities. Photographing sacred sites, ceremonies, or individuals without permission demonstrates disrespect and perpetuates exploitative tourism practices.
Always request permission before photographing people, especially guides and porters who facilitate your journey. Many appreciate being photographed but deserve the courtesy of being asked rather than treated as anonymous subjects.
Compensate subjects fairly when appropriate. If photographing local villagers during cultural activities, consider whether payment or other forms of reciprocity are culturally expected and ethically appropriate.
Advanced Techniques for Exceptional Images
Once you've mastered fundamental trekking photography skills, advanced techniques elevate your images to exceptional levels that stand out from typical mountain snapshots.
HDR and Exposure Blending
Mountain scenes frequently contain extreme brightness ranges impossible to capture in single exposures. The volcano's shadowed crater appears perfectly exposed while the bright sky blows out to featureless white, or the sky shows beautiful detail while the foreground becomes an impenetrable black silhouette.
High Dynamic Range (HDR) photography solves this challenge by combining multiple exposures of identical compositions. Shoot three or more frames bracketed two stops apart, then merge them during post-processing to create images showing detail throughout the entire tonal range.
Tripods stabilize your camera for perfect alignment between bracketed frames. However, handheld HDR remains possible with modern alignment algorithms that compensate for slight movement between exposures.
Panoramic Stitching
Volcanic craters, expansive ridgelines, and 360-degree summit views exceed what even ultra-wide lenses can capture in single frames. Panoramic stitching combines multiple overlapping images into seamless wide-format compositions.
Shoot panoramic sequences in portrait orientation rather than landscape. This technique captures more vertical detail and provides flexibility for various crop ratios during stitching.
Panoramic shooting guidelines:
- Use manual exposure mode to maintain consistent brightness across all frames
- Manual focus prevents focus shifts between frames
- Overlap consecutive frames by 30-40% for reliable stitching
- Level your camera carefully to minimize distortion
- Shoot quickly to prevent light changes during the sequence
Long Exposure Techniques
Long exposures transform ordinary scenes into surreal, artistic interpretations. Flowing clouds blur into ethereal streaks across volcanic peaks. Stars trace circular arcs around the celestial pole during all-night exposures.
Neutral density filters reduce light entering your lens, enabling long exposures even during daylight. Six-stop ND filters allow 30-second exposures in bright conditions, creating smooth water surfaces and ghostly cloud movements.
Night photography at mountain camps captures stunning star fields impossible to see from light-polluted cities. Understanding mountain photography opportunities during different seasons helps plan treks coinciding with new moon phases when celestial photography excels.
Mastering trekking photos transforms your mountain adventures into lasting visual legacies that inspire others and preserve your accomplishments for years to come. Whether you're capturing sunrise from a volcanic crater rim, documenting the camaraderie of multi-day expeditions, or creating stunning panoramas of mountain landscapes, the techniques and strategies outlined above ensure your images authentically represent the magnificence of your trekking experience. Hiking Mount Rinjani provides the perfect backdrop for applying these photography skills, offering experienced guides, quality equipment, and spectacular volcanic landscapes that create unforgettable photographic opportunities across their range of trekking packages.